
You picked the airplane up on Friday, flew it Saturday, and something that worked fine before the shop touched it has quit. Who pays? That depends on what caused the failure, the shop's warranty, and whether the damage is covered by insurance. A problem appearing after maintenance does not automatically mean the shop caused it. A maintenance-induced failure happens when an error during maintenance creates or contributes to a defect. Knowing what to inspect after pickup, and documenting anything unusual, can help you catch problems early and establish what happened if something goes wrong.
By the end of this you will have a six-step routine for taking delivery of your airplane from a shop, a clear idea of what breaks most often and why, and a practical answer to the money question. The inspection part adds maybe 30 to 45 minutes to a normal preflight. The paperwork and warranty side, if it comes to that, is an afternoon of emails and one uncomfortable phone call.
What a Maintenance-Induced Failure Actually Is
Think of it like getting your car back from the garage with the oil changed and the drain plug finger-tight. The shop did not break anything on purpose. A step got interrupted, a second pair of hands never checked it, and the failure waits for the first time the system is loaded.
Aviation human-factors training, including the FAA's own maintenance human-factors material and the widely taught "Dirty Dozen" list that came out of Transport Canada, puts the usual causes in plain terms: distraction, fatigue, lack of communication at shift change, lack of resources (the right part did not arrive), and complacency on a task the mechanic has done a thousand times. None of those require a bad mechanic. Good shops produce these too, which is exactly why the industry built sign-offs, duplicate inspections and post-maintenance check flights around them.
Here is what matters to you as the owner: the regulations give you a role in catching them. Under 14 CFR 91.403, the owner or operator is primarily responsible for keeping the aircraft in airworthy condition. Under 91.7, the pilot in command determines before every flight whether the aircraft is in condition for safe flight. The shop's signature returns the airplane to service; it does not transfer your preflight duty to anyone else.
The failures themselves follow patterns. Fluid systems leak at the connections someone opened. Fasteners that were removed are the ones that go missing. Controls that were disconnected for cable replacement or rigging are the ones that end up reversed. Things left behind — rags, caps, tools, inspection plates — are in the compartments that were open. If you know what the shop opened, you know where to look.
Step 1: Set the Terms Before the Airplane Goes In
The time to settle who pays is before anyone picks up a screwdriver, not after the oil is on the hangar floor.
Ask the shop for a written work order that lists the scope of work, an estimate, and the shop's warranty terms. Many general aviation shops warrant their own labor for something in the range of 30 to 90 days or a set number of flight hours, with parts covered separately by the manufacturer's own warranty. That range varies a lot by shop and by region, so get the actual number in writing rather than assuming the one you heard at the FBO counter.
Three things to pin down in the work order: whether you approve any work beyond the estimate before it happens, whether removed parts are returned to you, and who pays for a ferry or recovery if the airplane has to come back. The last one is the clause owners never think about and always need.
Pro Tip: Ask to keep the removed parts, even the worthless ones. A cracked bracket or a worn hose in a box on your shelf is physical evidence later, and it also tells you quickly whether a part that was billed was actually replaced.
Heads Up: If the shop is installing used or surplus parts, ask to see the traceability paperwork for each one. Bogus and undocumented components still circulate in the parts market, and they are far easier to refuse at the counter than to argue about afterward. Our guide on spotting counterfeit aircraft parts covers what good traceability looks like.
Step 2: Read the Paperwork Before You Touch the Airplane
When you arrive for pickup, go to the logbooks and the invoice first. Sit down with them. You are doing two things: confirming the airplane is legally returned to service, and building yourself a map of exactly what was opened.
Under 14 CFR Section 43.9, ordinary maintenance records must describe the work performed, give the completion date, identify the person who performed the work if different from the approver, and include the approver's signature, certificate number and certificate type. Annual and other required inspection entries follow Section 43.11, which has separate requirements for the inspection type, scope, aircraft time and airworthiness determination. Ask for an itemized invoice or work report showing which cylinders, hoses, cables and panels were worked on, since an annual inspection entry does not have to list every individual inspection task.
Then cross-check the invoice against the entry. The invoice is usually far more detailed than the logbook and will tell you the shop pulled the right-side inspection panels, dropped the belly pan, or disconnected the static system for a 91.411 pitot-static check. Each of those is a place to look in Step 3.
Why It Matters: That paperwork is not bureaucracy, it is your evidence. If a failure turns into a dispute, the question becomes "did their work touch this system?" A specific logbook entry and a line-item invoice answer that in one sentence. A vague entry means you are arguing from memory.
Also confirm that any required recurring item — an airworthiness directive, a service bulletin the shop agreed to comply with, a transponder or altimeter certification — actually appears with its compliance method and next-due date. Missing compliance records are their own kind of induced problem, and they surface at the worst time, usually during a prebuy two years later.
Flying411 keeps aircraft listings, maintenance explainers and ownership guides in one place, so you can compare what a clean logbook looks like against what you are being handed.
Step 3: Walk the Airplane Cold
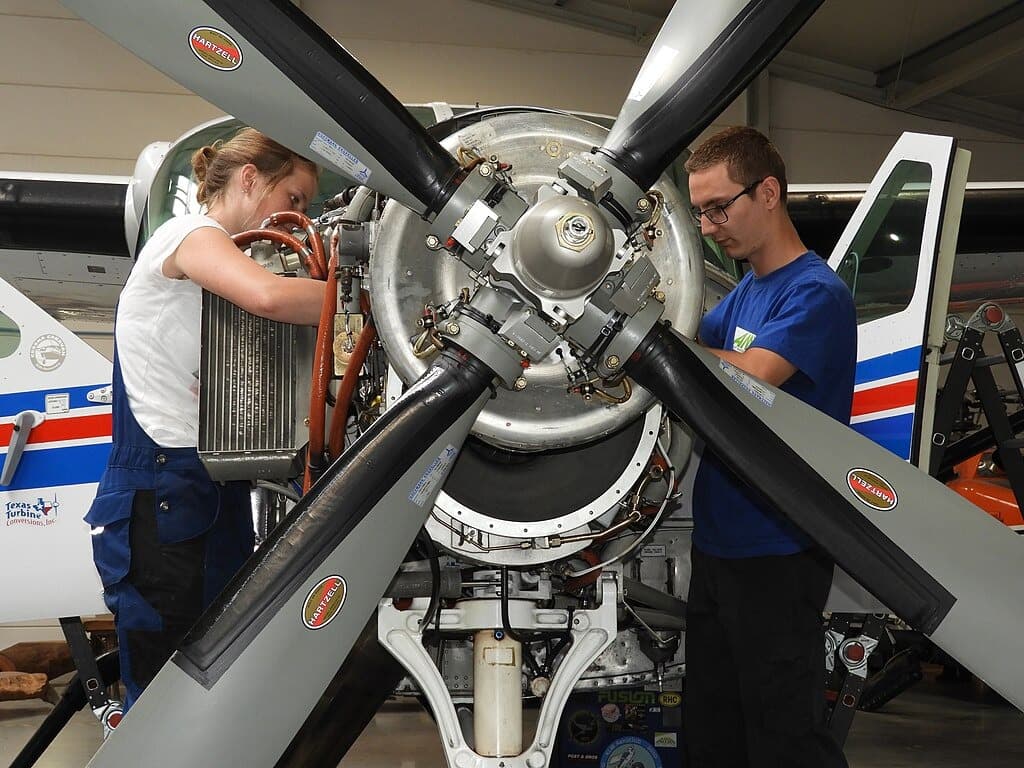
Now do a preflight that is longer and nosier than your usual one. A post-maintenance walkaround is less like a preflight and more like a home inspection on a house you already own: you are looking for what changed, not for what is familiar.
Work from the invoice. For every system the shop touched, check the connection, the security and the safety.
- Fasteners and panels. Count screws on every inspection panel and cowl fastener. Missing and mismatched screws, cross-threaded fasteners and un-latched cowl pins are the single most common thing owners find.
- Safetying. Oil filter, oil drain plug, fuel line B-nuts, turnbuckles, prop bolts, control rod ends. Safety wire should be there, tight, and wound in the direction that resists loosening. A missing cotter pin on a control rod end is small, cheap and catastrophic.
- Leaks. Open the cowl. Look at every fitting the shop disturbed with a flashlight and a clean rag. Fresh oil, fuel staining or blue dye around a connection is not "settling in."
- Chafing and routing. Hoses, wires and control cables that were moved need to go back in their clamps. A fuel line resting on an engine mount tube will wear through, and it will do it quietly.
- Foreign objects. Shine a light into every compartment that was open. Rags, zip-tie tails, sockets, drill shavings, bore scopes, caps. Shake the tail and listen.
- Caps, covers and filters. Oil filler cap on and latched. Fuel caps seated and sealing. Air filter installed. Pitot cover and static port plugs removed — that one has caused real accidents after a static system check.
- Tire and brake condition. If wheels came off, look for crossed brake lines, air in the system, and proper torque markings on the axle nuts.
Sump every drain, including ones you normally skip. If the fuel system was opened, debris and sealant chips end up in the strainer. Then check the oil level yourself and compare it to what the invoice says was added.
Keep in Mind: If the airplane sat at the shop for weeks or months waiting on parts, you have two problems stacked on each other — the maintenance work and the effects of sitting. Corrosion, dried seals, flat-spotted tires and rodent damage all show up after idle time. Our piece on what to check when an airplane has sat for a year is worth a read before a long-stay pickup.
Step 4: Ground Run and Control Check
Before you fly, run the engine and work every control in the cockpit, with someone outside watching.
Controls first, engine off. Move the yoke or stick to each stop and have your helper confirm the surface moves the correct direction and reaches full travel. "Free and correct" is the oldest line in the checklist and it exists because rigging errors after cable or bellcrank work are real. Do the same for rudder, trim and flaps. If the shop rigged anything, verify trim tab direction too — a reversed trim tab is subtle on the ground and ugly at rotation speed.
Then start the engine using the aircraft's approved checklist and verify that oil pressure rises within the manufacturer's specified limits. Complete the applicable ground-run checks, including magnetos, carburetor heat or alternate air, propeller operation, electrical output and other systems affected by the maintenance. Check fuel selector operation and boost pump function only as directed by the aircraft's POH or maintenance procedures. Do not select OFF or an empty tank with the engine running, and do not perform additional system checks unless the manufacturer's instructions allow them.
Shut down, re-open the cowl while everything is hot, and look again for leaks. Many fittings only weep once pressure and heat are on them. This second look catches more than the first one does.
If anything is off — a mag drop outside limits, a rough idle that was not there before, a gauge reading differently — stop. Do not fly it to "see if it clears up." Lycoming's own service publications and the engine maker's operating manual give the acceptable limits for mag drop, oil pressure and temperature; the airplane either meets them or it goes back in the hangar. If you are chasing a rough-running engine after a shop visit, our rundown of common Lycoming engine problems is a useful starting list.
| Step | What you need | How long it takes |
|---|---|---|
| 1. Set terms before the work | Written work order, estimate, warranty terms, parts-return clause | 20–30 minutes, once |
| 2. Read the paperwork at pickup | Logbooks, itemized invoice, AD and inspection compliance records | 20–40 minutes |
| 3. Post-maintenance walkaround | Flashlight, mirror, clean rag, fuel tester, the invoice as your map | 30–45 minutes |
| 4. Ground run and control check | A helper outside, POH checklist, engine limits | 20–30 minutes |
| 5. First flight as a test flight | Good weather, no passengers, local airspace, a written plan | 0.5–1.0 hour of flight |
| 6. Document and claim | Photos, dated notes, invoice, shop contact, insurance broker | 1–2 hours, plus follow-up |
Step 5: Fly the First Flight Like a Test Flight
The first flight after maintenance is not the day to take the family to lunch 300 miles away. Fly it solo, in good weather, in daylight, within gliding distance of the field for as long as the airspace allows, and climb to a safe altitude before you start checking systems.
There is a regulation behind this habit. Under 14 CFR Section 91.407(b), maintenance that may have appreciably changed an aircraft's flight characteristics or substantially affected its operation in flight requires an operational check flight by an appropriately rated pilot holding at least a private pilot certificate, with the flight logged in the aircraft records before passengers can be carried. However, Section 91.407(c) allows the check flight to be omitted when ground tests, inspections or both conclusively show that flight characteristics and operation have not been substantially affected. Flight control rigging and major repairs deserve particular attention when determining whether a check flight is necessary.
Good to Know: Even when 91.407(b) does not strictly apply — a simple oil change, say — flying the first post-maintenance hour alone is free insurance. We go deeper into planning that flight in First Flight After an Annual: Plan It Right.
Write your plan down before you start the engine: what you will check, in what order, and what your abort criteria are. Watch engine instruments continuously for the first ten minutes. Check that the airplane flies hands-off in trim the way it did before. Test the autopilot at altitude, not in the pattern. Land, taxi in, and open the cowl one more time.
Flying411 keeps engine guides, inspection checklists and model-specific maintenance articles in one place, so you can compare what normal looks like for your airframe before you go fly it.
Step 6: Something Broke — Document It First
If a failure shows up, resist the two instincts that cost owners money: fixing it yourself, and calling the shop to vent before you have anything written down.
Do this in order:
- Secure the airplane and leave the evidence alone. Do not remove the loose fitting, do not re-safety the filter, do not clean up the oil. Photograph it in place, from several angles, with something in frame for scale.
- Write down the timeline. Pickup date and time, hours flown since, what you observed and when. Dates on photos help.
- Match it to the invoice. Point at the specific line item that touched the failed system.
- Notify the shop in writing. Email, not just a phone call. Short, factual, no accusations: here is what happened, here is the date, here is the line on your invoice, here are photos, how would you like to proceed.
- Notify your insurer if there was any damage beyond the part itself. Most policies require prompt notice of a loss, and a late report is a reason to deny.
- Get a second opinion from an independent A&P if the shop disputes the cause. An inspection report from a disinterested mechanic is worth more than your word.
If the failure happened away from home and the airplane is not airworthy, you may need a special flight permit under 14 CFR 21.197 to fly it back for repair. Our walkthrough on getting a ferry permit explains what the FAA needs and how long it takes.
Who Actually Pays
There are four pockets, and which one opens depends on what broke and what it damaged.
The shop's workmanship warranty. This is the first and usually the easiest path. If the work was defective and you are inside the warranty window, a reputable shop fixes it at no charge. Most want to — their reputation at a small airport is the whole business. Bring them the airplane, the photos and the invoice, and give them the chance to make it right before you escalate anything.
The shop's liability insurance. When a defect causes real damage — a prop strike, an engine that was run without oil pressure, a gear collapse — the claim moves to the shop's products and completed operations liability coverage. That is the policy that responds to work they performed and released. You generally cannot claim against it directly on day one; the shop reports it and their carrier investigates. Expect weeks, not days.
Your hull insurance. Most aviation hull policies exclude the cost of the defective part and the faulty labor itself, but cover the resulting physical damage to the aircraft. In plain terms: if a loose fuel fitting causes a forced landing, your policy is likely to pay for the bent airframe but not for the fitting that should have been tight. Your insurer may then pursue the shop to recover what it paid, which is called subrogation. Read your own policy wording, or have your broker read it to you, before you assume.
You. This is the outcome when cause cannot be proven. If the logbook entry was vague, you cleaned up the evidence, you flew 40 hours before noticing, or an independent mechanic says the failure was wear and not workmanship, the bill lands on your side. Steps 2, 3 and 6 above exist mostly to keep you out of this pocket.
Quick Tip: If the shop refuses and the dispute is about airworthiness rather than money, you can file a report with your local FAA Flight Standards District Office or through the FAA Safety Hotline. That process addresses certificate holders and safety; it does not get your invoice refunded. For the money, small claims court or a demand letter from an aviation attorney is the realistic lever, and both work better with the documentation from Step 6.
Flying411 keeps ownership cost guides, maintenance articles and aircraft listings in one place, so you can compare what a shop visit should cost before the invoice arrives.
Building the Habit So It Costs You Nothing
Owners who never seem to have these problems are not luckier. They have a routine. The invoice becomes the inspection map. The first flight is always solo. The photos go in a folder with the date on them. After two or three shop visits the extra 45 minutes stops feeling like paranoia and starts feeling like preflight.
It also changes how shops treat you, in a good way. A customer who reads the logbook entry at the counter and asks which panels were opened is a customer the shop double-checks for. That is not cynicism; it is how quality control works everywhere. The same logic drives the duplicate inspections and scheduled-check discipline described in our overview of A, B, C and D maintenance checks on the airline side.
Key Takeaways
A maintenance-induced failure is a defect that did not exist before the shop visit, and the risk is concentrated in the first flight or two afterward, which is exactly where your own inspection does the most good. Settle warranty terms, parts return and recovery costs in a written work order before the work starts, then use the itemized invoice as a map for a longer-than-normal walkaround looking at fasteners, safetying, leaks, routing and anything left behind. Plan the first flight conservatively, preferably without passengers, in good weather and close to the field. Remember that 14 CFR Section 91.407(b) requires an operational check before carrying passengers after certain maintenance, unless the exception under Section 91.407(c) applies. If something does fail, photograph it before you touch it, match it to a line on the invoice, and notify the shop and your insurer in writing. Who pays comes down to proof: the shop's warranty or liability coverage when the cause is clearly their work, your hull policy for resulting damage with the defective part usually excluded, and you when nobody wrote anything down.
The Bottom Line for Owners
A maintenance-induced failure is one of the few ownership risks you can meaningfully shrink with nothing but time and a flashlight. Forty-five minutes at pickup, one careful solo flight, and a habit of writing things down covers most of it. The rest is picking a shop that returns your calls when something goes wrong, which you learn by watching how they behave the first time it does.
When you are ready to compare listings, visitFlying411and see what is on the market today.