Discover insights, tips, and stories from the skies — from aircraft buying guides to pilot training.


Published: September 16, 2025
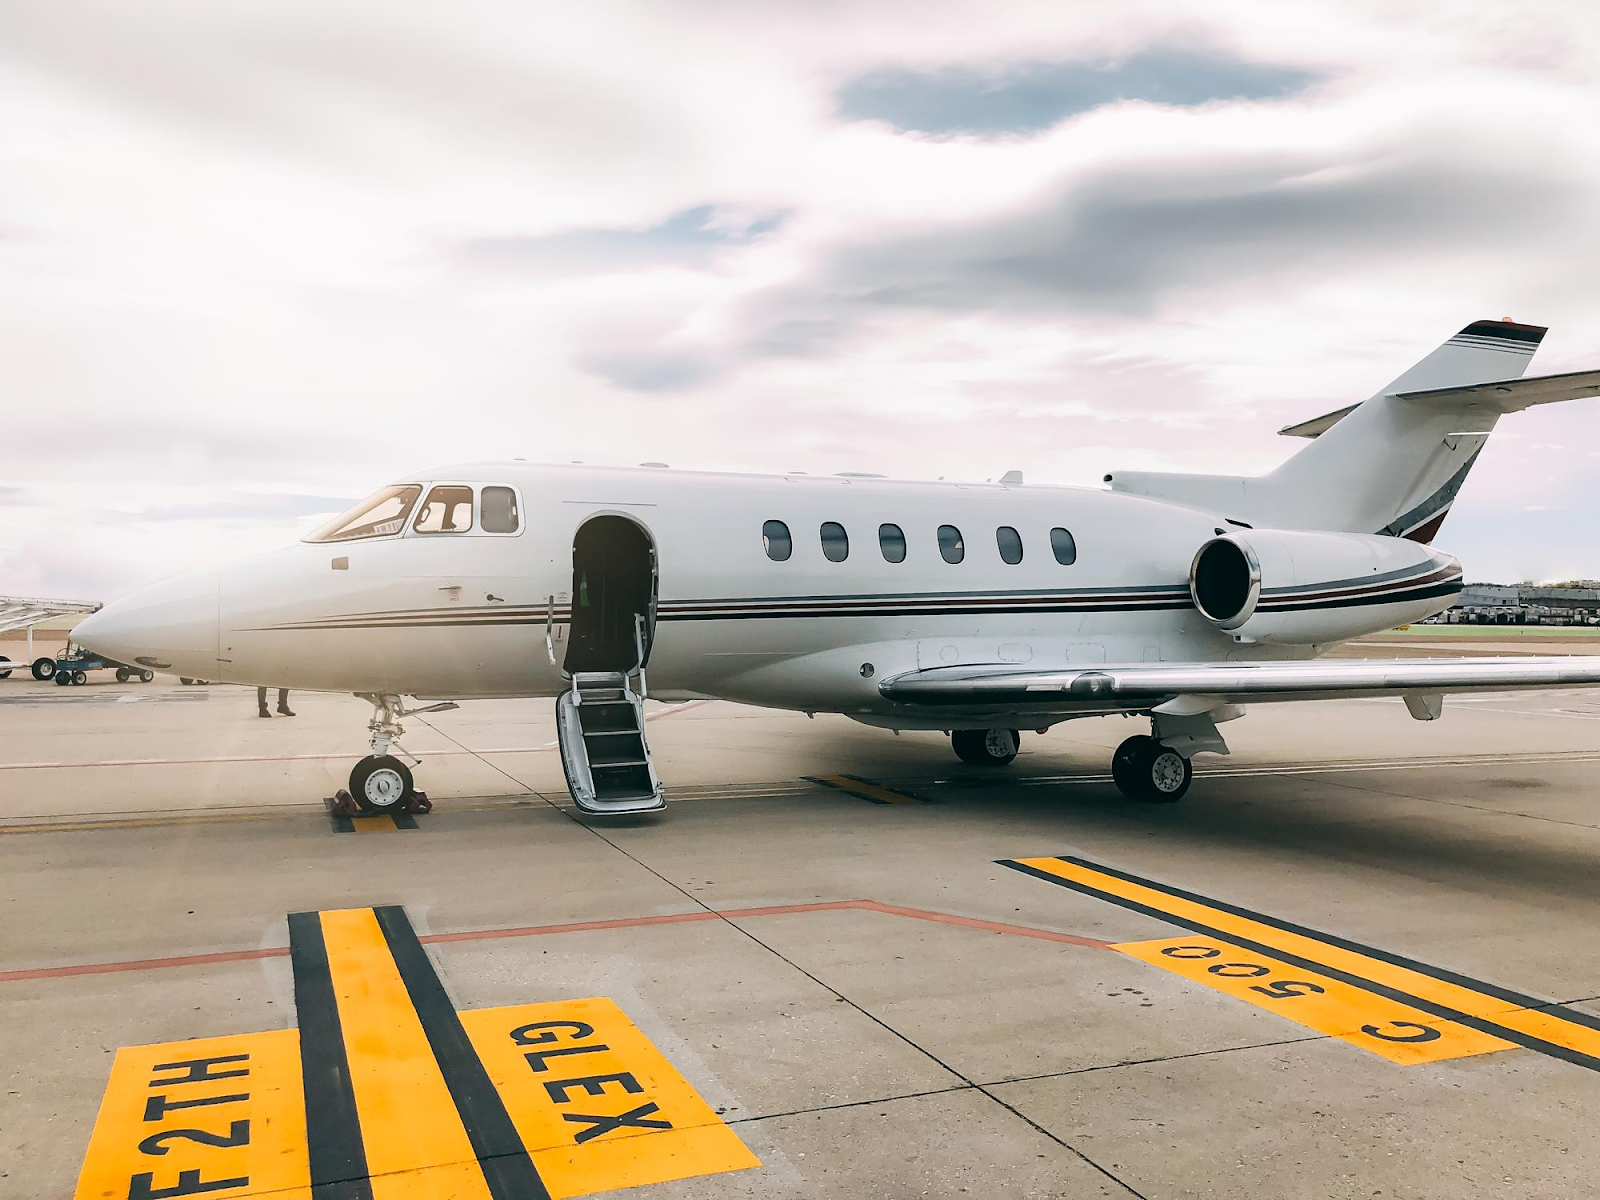
Buying a plane is exciting! But before you sign any papers, you need to know what you’re really getting. An aircraft pre-purchase inspection helps you find problems before they become expensive surprises. It’s the smart step that separates a happy new owner from a frustrated one stuck with unexpected repairs.
Most U.S. general aviation planes are over 50 years old, so checking age, care, and records is critical before you buy.
Every airplane tells a story through its parts, paperwork, and history. A careful inspection helps you read that story clearly. You’ll know if the plane is safe, what it might need soon, and how well it’s been cared for.
This guide explains what happens during this process and why it matters for every buyer.
A pre-purchase inspection (often called a PPI or prebuy) is a careful look at a used aircraft before money changes hands. Think of it as a detailed health check for a plane. The goal is to make sure the aircraft is airworthy, safe, and worth the price.
During this inspection process, an experienced A&P mechanic or technician checks everything from the airframe to the engine and avionics. They review the airplane’s records and run through a detailed checklist. It’s all about finding any airworthiness issue that could affect safety, performance, or cost.
Here’s what usually happens:
The inspection program follows the aircraft’s make and model, often based on the maintenance manual from the OEM or an MRO. Some buyers also request a thorough review equal to an annual inspection, especially if they plan a long-term aircraft purchase.
When the inspection is complete, the mechanic lists any discrepancies found. These are things that need repair or further review before calling the aircraft fully airworthy.
If something serious comes up, like engine damage or missing records, the buyer and seller can decide how to rectify it—maybe the seller agrees to fix it, or the buyer uses it to lower the price. The goal is to make a clear, informed choice.
A proper pre-buy inspection can save weeks of downtime, prevent unexpected costs, and keep a plane from going AOG (Aircraft on Ground). It’s one of the most important steps in any aviation deal.
Skipping a pre-buy inspection can be one of the costliest mistakes a buyer can make. Even an airplane that looks clean can hide issues that affect safety or value. A professional inspection is your chance to catch them early.
When you inspect a plane before buying, you’re protecting yourself from hidden problems. These might include corrosion in the airframe, an engine near overhaul, or missing airworthiness paperwork. Some of these repairs can cost thousands of dollars and keep the plane grounded for months.
Here’s why a pre-buy is so important:
During the inspection, the mechanic might also check for major modifications or unapproved parts. They verify the inspection program meets FAA standards and confirm that past work matches the maintenance manual.
The inspection helps both sides — the buyer and seller. If the aircraft is in good shape, it builds trust. If problems are found, everyone knows what needs to be done. The seller can choose to fix the issues or adjust the deal.
If big repairs or discrepancies found mean more work than expected, the buyer might request a quote for needed fixes or walk away. Either way, the inspection gives the buyer control and clear information.
Organizations like AOPA remind owners that a pre-buy is essential for protecting airworthiness and resale value. Without one, the buyer could face hidden damage or costly compliance gaps with airworthiness directives.
Think of it this way: planes age differently based on how they’re flown, stored, and maintained. A thorough inspection helps you see how this particular airplane has been treated. It’s the best step toward a confident, informed aircraft purchase.
A pre-purchase inspection should always be handled by someone independent — not the seller’s regular shop. The best choice is a trusted A&P or certified MRO service center familiar with your aircraft’s make and model. They understand the systems, common wear points, and airworthiness details specific to that type.
Here’s how the process usually works:
A good inspection includes a written checklist and a report listing any discrepancies found. The mechanic should also review the engine program, landing gear, avionics, and other major systems for airworthiness and performance.
Every part of the inspection process is guided by the FAA rules and the manufacturer’s maintenance manual. That means nothing is skipped, from corrosion checks to major repair documentation.
Once the physical inspection is done, the results help decide what happens next. If the plane is mostly airworthy, the deal can move forward. If problems show up, the buyer can rectify them before closing, request a quote for repairs, or renegotiate.
Choosing a skilled technician and reliable shop helps avoid downtime and missed details. With the right person in charge, the inspection becomes more than paperwork — it’s your best protection against risk.
Every plane, even a new one, deserves a careful look before changing hands. The inspection gives confidence to both sides and helps keep every aircraft flying safely for years to come.
When you’re planning to buy a plane, the inspection of the aircraft is one of the most important steps in the whole transaction. It helps you understand the true condition of an aircraft before you agree to pay for it.
Every type of aircraft—from a small single-engine plane to a large business jet—goes through this process a little differently. Still, the goal stays the same: to find out what’s working well, what needs attention, and what might cost you expenses later.
| Stage | What Happens | What to Look For | Why It Matters |
| 1. Paperwork Review | The mechanic checks logbooks, service records, and the aircraft’s flight manual. They confirm the plane matches its documents. | Missing pages, skipped years, or unclear ownership history. | Ensures the records match the airplane and that maintenance has been done correctly. |
| 2. Exterior Check | A walk-around inspection of the airframe and outer surfaces. Panels may be opened for closer viewing. | Corrosion, dents, cracks, paint blisters, or delamination. | Helps reveal structural damage or repairs that could affect safety or value. |
| 3. Interior Inspection | The inside of the cabin and cockpit are checked for condition and function. | Worn seats, loose controls, and missing safety gear. | Confirms comfort and basic safety equipment are in good shape. |
| 4. Engine and Propeller Review | The mechanic looks closely at the engine, oil system, and propeller assembly. | Oil leaks, low compression, dirty filters, or odd sounds during a run-up. | The engine is one of the most expensive parts—small problems here can lead to big repair bills later. |
| 5. Avionics and Systems Test | Radios, GPS, lights, and instruments are powered up and tested. | Dead screens, outdated software, or poor connections. | Ensures the aircraft meets safety and flight communication standards. |
| 6. Landing Gear and Undercarriage | The wheels, brakes, and gear struts are inspected on the ground or while jacked up. | Uneven tire wear, fluid leaks, or worn bearings. | These systems must be reliable for safe takeoffs and landings. |
| 7. Test Flight or Ground Run | Some inspections include a short flight or engine run to test real performance. | Unusual vibration, slow response, or odd readings. | Confirms the aircraft operates smoothly under real conditions. |
| 8. Report and Findings | The mechanic writes a summary of all results and lists any problems found. | Detailed notes, photos, and repair suggestions. | Gives the buyer a full picture of the aircraft’s true condition and helps guide the next step. |
The following is a calm, detailed walk through what usually happens during a pre-purchase inspection.
First, the buyer and seller decide where and how the inspection will happen. The shop or existing mechanic that does your regular work shouldn’t be the one to perform the inspection. It’s better to choose a non-biased professional or service center with no connection to either side. This keeps everything fair and transparent.
The shop will often ask for key documents before they start. These include the flight manual, maintenance logs, and other records that show the history of the aircraft. These papers tell a lot about past repairs, upgrades, and ownership. The mechanic uses them to plan what needs extra attention during the physical checks.
Before anyone opens a panel or starts an engine, the first part of the inspection happens at a desk. The mechanic looks through all the logbooks and records to confirm that everything matches what’s advertised. This includes:
By reviewing these papers, the mechanic can spot missing entries or gaps in the timeline. For example, if the logbook skips a few years, it could mean work was done without proper documentation. That’s a red flag. Missing or incomplete paperwork can delay your registration, limit resale value, or even affect safety.
Next comes the hands-on part. This is where the mechanic or inspection team looks at the general condition of the airplane. The inspection is usually done in stages, starting with larger systems and moving toward finer details.
Here’s what they often check:
Each finding is recorded. If anything seems off, the mechanic notes it and explains how serious it is. Some problems that might appear are small and easy to fix, while others could require deeper repairs or parts replacement.
The age of the aircraft matters a lot. An older plane usually needs extra attention in certain areas. Older wiring, hoses, or seals may need replacement, and corrosion can be more common. Some older models also have limited parts availability, which can add cost or time if repairs are needed.
For newer airplanes, the inspection focuses more on verifying software, avionics updates, and that all warranty work is complete. The mechanic also checks that any alteration done to the plane followed FAA-approved methods.
When the inspection is finished, the mechanic gives a full report. It lists every finding, from small cosmetic details to major mechanical issues. The report might include photos, cost estimates, and notes about what’s urgent.
This report helps you decide what to do next. If the aircraft may need major repairs or shows a poor maintenance record, you can step back before signing anything. If the issues are minor, you can ask the seller to fix them or adjust the price.
A good inspection can reveal issues that weren’t visible before—like hidden corrosion, minor leaks, or incomplete paperwork. These findings aren’t always deal-breakers, but they help you make smart choices.
The best part? You’ll know exactly what you’re getting, and you can plan future maintenance more easily. That’s peace of mind every pilot deserves.
Every aircraft should be inspected carefully before it’s sold. A well-planned checklist makes sure nothing is missed.
| ✅ | Inspection Area | Key Items to Check | Why It’s Important |
| ☐ | Documentation & Records | • Complete logbooks for airframe, engine, and propeller• FAA registration and airworthiness certificate• List of Airworthiness Directives (ADs) complied with• 337 forms for repairs or modifications• Maintenance tracking system updates• Flight manual and equipment list | Confirms the airplane’s legal status and maintenance history. Missing or unclear records can reduce value or delay registration. |
| ☐ | Exterior / Airframe | • Surface condition, dents, cracks, corrosion• Paint wear and signs of delamination• Landing gear mounts and wheel wells• Antennas and external fittings• Evidence of previous repairs or alterations | Reveals damage, poor repairs, or age-related wear that may affect airworthiness. |
| ☐ | Engine & Propeller | • Engine hours and time since overhaul• Oil analysis and filter inspection• Compression test results• Borescope inspection for internal condition• Propeller blades for nicks or corrosion• Engine mounts and hoses | The engine is the most expensive part of the plane. Early detection of wear prevents costly downtime. |
| ☐ | Fuel & Oil Systems | • Fuel tanks for leaks or stains• Fuel caps and vent lines• Fuel filters and drains• Oil levels, filters, and signs of contamination | Ensures reliable operation and helps avoid contamination issues that can lead to in-flight engine problems. |
| ☐ | Avionics & Electrical Systems | • Radios, GPS, and navigation units• Transponder and ADS-B function• Circuit breakers and fuses• Lights, switches, and indicators | Verifies that all communication and navigation systems meet FAA standards and work properly. |
| ☐ | Interior / Cabin | • Seat belts, harnesses, and seat tracks• Cabin floor and panels for corrosion or damage• Emergency equipment (fire extinguisher, ELT)• Condition of upholstery and controls | Confirms passenger comfort and cabin safety. Worn interiors can hide corrosion or past water leaks. |
| ☐ | Flight Controls | • Control cables and pulleys• Movement of yoke, pedals, and trim• Hinges and rod ends for play or corrosion | Smooth control movement is vital for safe flight handling and responsiveness. |
| ☐ | Landing Gear & Brakes | • Tire tread and pressure• Shock struts for leaks• Brake pads and lines• Retraction system (if retractable gear) | Ensures safe ground handling and proper gear function for takeoff and landing. |
| ☐ | Instruments & Indicators | • Airspeed, altimeter, attitude, and engine gauges• Gyro instruments stability• Pitot-static system inspection | Confirms accurate flight data readings—critical for safe navigation. |
| ☐ | Corrosion & Structural Integrity | • Hidden areas under floor panels and battery boxes• Wing roots, tail cone, and control surfaces• Structural fasteners and seams | Detects hidden corrosion or fatigue that can weaken the airframe over time. |
| ☐ | Test Run or Flight (if applicable) | • Engine start and idle quality• Vibration, noise, or oil pressure changes• Handling and system response• Check for any warning lights or leaks after shutdown | Confirms the aircraft’s real-world performance before completing the deal. |
| ☐ | Final Report & Summary | • Written summary of findings• Cost estimates for repairs• Recommendations for service or upgrades• Photos of problem areas | Helps the buyer make informed choices about repair negotiations or final approval. |
Here’s what a more detailed inspection may include:
A complete record set is vital for confirming airworthiness. The inspector should check:
If anything is missing or looks unclear, the mechanic should ask questions before moving on.
This step focuses on how the airplane looks and feels on the outside. The mechanic will:
Minor flaws can often be fixed easily, but deeper structural issues can mean larger expenses later.
The engine is the heart of the aircraft, and it deserves careful attention. The mechanic will:
If the engine is nearing overhaul time, that can greatly affect the sale price or negotiation.
Inside the cabin, inspectors review comfort and function:
They also test avionics—radios, transponders, navigation systems—to confirm accuracy and reliability.
Once everything else checks out, the plane might go on a short ground or flight test. This helps the mechanic verify handling and system performance under real conditions. They’ll watch for vibrations, strange noises, or irregular readings. Any unusual finding gets added to the report.
After all testing and paperwork review, you’ll receive a summary. This outlines the condition of the aircraft, lists every issue found, and includes estimated costs for each fix.
The mechanic may also suggest timelines for future maintenance or note optional upgrades. If the plane passes all checks and shows proper documentation, the report will confirm that the aircraft is airworthy and ready for purchase.
With the report in hand, you can make an informed choice. You might move forward confidently, ask the seller to fix issues, or choose to walk away. Having this information gives you full control of the transaction.
The inspection helps ensure that what you want to buy truly meets your expectations and is safe to fly.
A thorough pre-purchase inspection is your best protection against surprise costs or safety problems later. It may take time, but it’s worth every hour. When you understand the full condition of an aircraft, you make smarter choices, avoid unnecessary risks, and enjoy the skies with confidence.
An aircraft pre-purchase inspection gives peace of mind before buying any airplane. It tells you what shape the aircraft is in, what might need fixing, and how well it’s been cared for. For a buyer, it’s the difference between a smart deal and an expensive lesson. Always work with qualified professionals and take time to review every detail before closing.
If you’re ready to learn more about safe, confident aircraft ownership, visit Flying411 today — your trusted resource for aviation insights and buying tips.
It covers the airplane’s records, structure, engine, systems, and avionics. The mechanic checks for corrosion, repairs, and signs of wear.
Most inspections take two to seven days, depending on the aircraft’s size and condition.
Usually, the buyer pays, but the cost can be shared if both agree in writing before the inspection starts.
No. Even new or low-hour planes can have paperwork errors or early issues that affect airworthiness.
Look for an independent A&P, MRO, or OEM service center experienced with your aircraft’s make and model.
